How To Use Google Messages on Chromebook

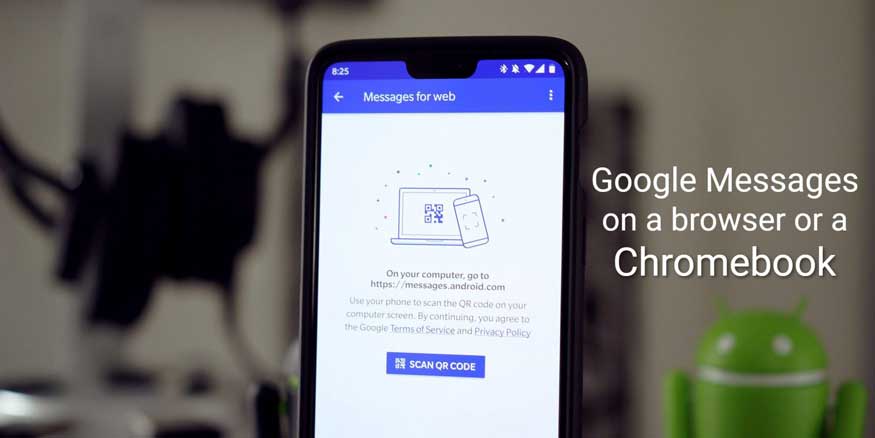
Google Messages is an SMS/instant messaging app from Google. The service was initially released on Android. And back in 2018, Google released a web version of the same, a decision by Google thanks to WhatsApp and Telegram. So in this guide, we’ll tell you how to use Google Messages on Chromebook using a web browser. 

Google Messages on Chromebook

Setting up Google Messages on the web is similar to setting up WhatsApp web. But it involves some more setting up, so make sure to stay with us till the end. By the looks of it, Google might still be trying to establish its part in the messaging community. And Google Message web proves to be a smart move from Google. Before we proceed further, make sure you have the following.

Related | How to disable Google Assistant – Android and iOS

Pre-requisites

  • Install Google Messages on your smartphone from the Google Play Store
  • Make Google Messages the default app for messaging.

Steps to use Google Messages on Chromebook

You could connect Google Messages to two kinds of devices. A Chromebook or anything other than a Chromebook. We’ll start with the second one as the first one is a bit more involving. But remember that a Chromebook provides the best user experience among both. 

From a Browser

As said earlier, setting up Google Messages on the web is very simple.

  1. Go to Messages for web from your PC/Laptop.
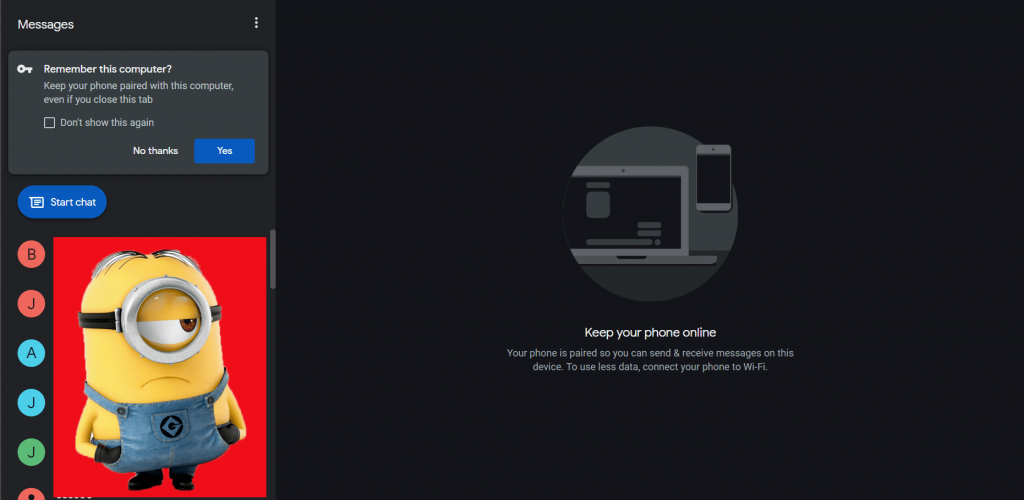
  2. You’ll see a QR code with the option Remember this computer. Check the radio button if you plan to use it often.
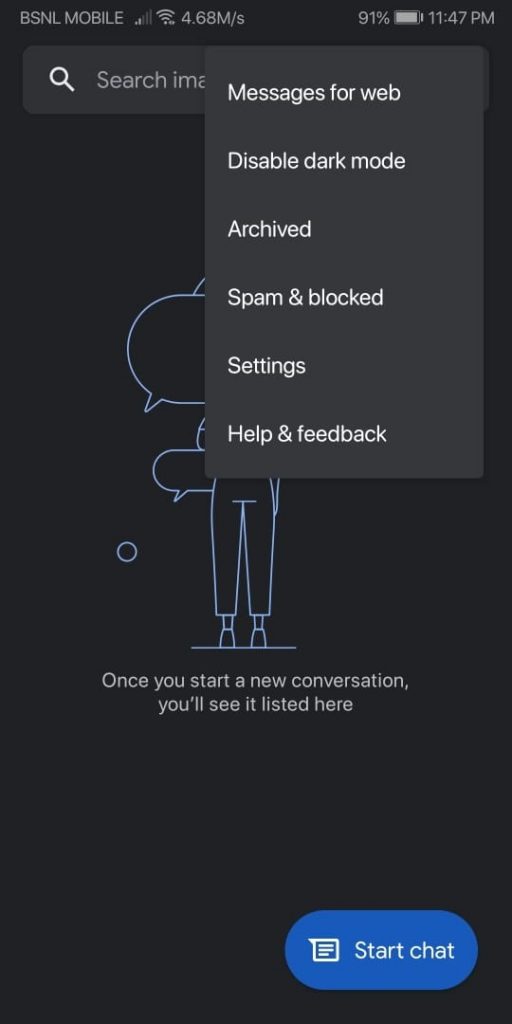
  3. Now open Messages on your phone. Click on the 3 dots at the top-right corner of the app.
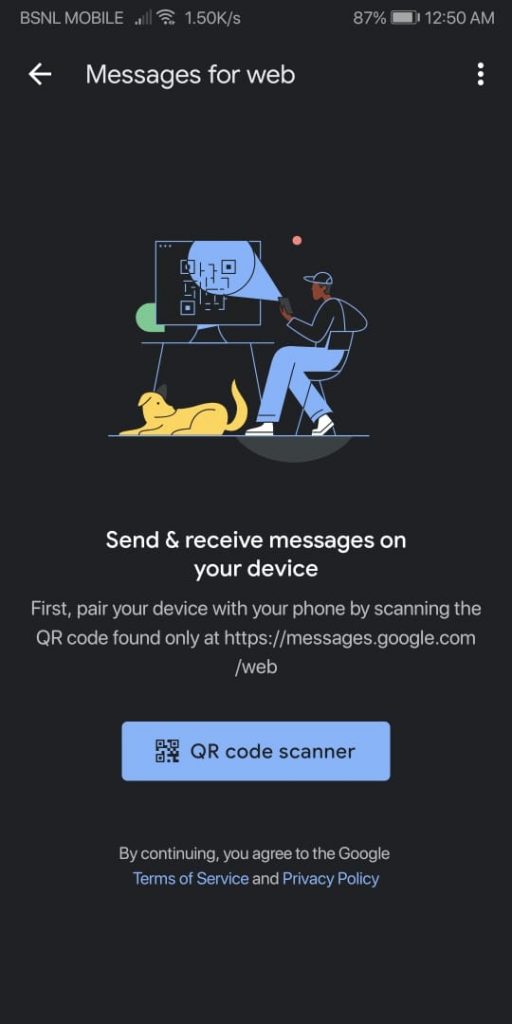
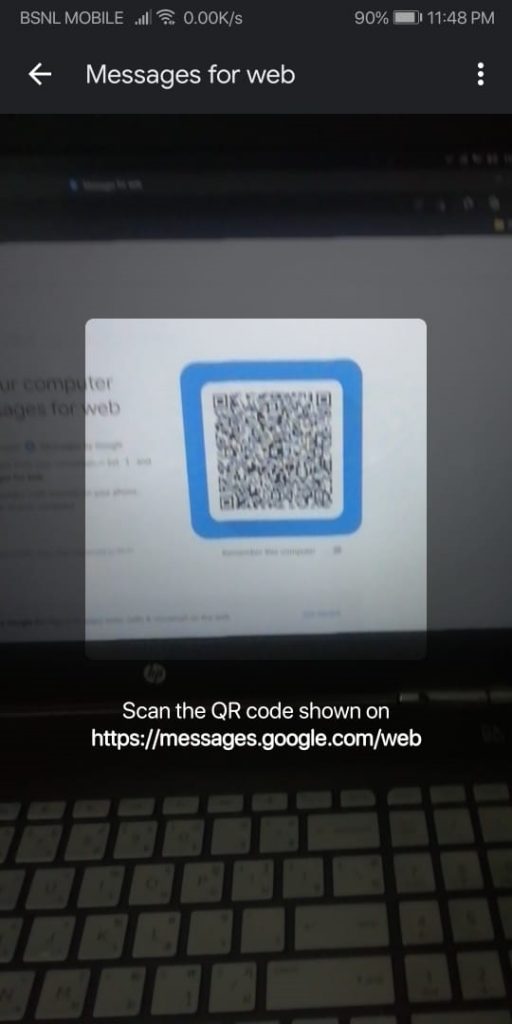
  4. Click on Messages for web and click on the QR code scanner in the newly opened window. 
  5. Point the scanner to the QR code displayed on the browser. The scanner will now scan the code, and you’ll be able to use the Messages app from your browser.
    QR Code on Chromebook
     
  6. Refer to the following screenshots for further guidance.

Unlike WhatsApp, Messages lets the user make video calls from within the web version of the service. You could use the service to send messages through the phone. And yes, it will cost you as per your plan. But it is always a good thing to have the messenger on the PC. This will come in handy while working or on a busy day. 

From a Chromebook

You have to connect your smartphone to the Chromebook to unlock the complete experience. If you haven’t done that yet, follow these steps.

  • Make sure that you’re signed in to the phone and Chromebook using the same Google Account.
  • Open Settings on the Chromebook.
  • Go to Connected devices > Android phone and click on Set up.
  • Choose the phone you wish to connect with and click on Accept and continue.
  • Type in your Google Account password and click on Done.

This should hopefully establish a connection between your smartphone and Chromebook. Now we can set up Messages on the Chromebook.

  • Open Messages on your Chromebook from the App Drawer. It can be opened by clicking on the circle at the bottom-left corner.
  • Similar to the web, a QR code will be displayed. Here also you choose to Remember this computer to stay signed in.
  • Open Messages on your phone and open the QR code scanner the same way we did in the last method.
  • Scan the QR code on the Chromebook, and you’ll be able to manage your message using the Messages app on your Chromebook. 
  • Even if you check to Remember this computer, you’ll be signed out automatically after 14 days of inactivity. 
  • You could also sign out by clicking on the 3 dots at the top-left corner of the Messages app and choosing Sign out on your Chromebook. You could also do the same from your phone. 
Also Read | Best Google Chrome Tab Managers

One could also use Google Messages from the browser of their Chromebook by following the first method.

Messages for the web from Google are great as it lets the user send SMS through their PC/Laptop and connect with friends. We hope you found this guide on How To Use Google Messages on Chromebook helpful. Let us know in the comments if you need any further information. 

How to install IPTV on Roku 2025

Thanks to multiple useful features of Roku that allow the users to watch several channels and services. Although the users can also install IPTV on Roku to seamlessly enjoy the live streaming. There are some direct and some indirect ways to access the IPTV on Roku.

install iptv on roku

Note: We do not endorse using such services via illegal means, or websites. We suggest you use licensed services while operating legally. We are not responsible for any media accessed and we assume that all visitors are complying with the copyright laws set forth within their jurisdiction. 

IPTV is a media service that stands for Internet Protocol Television. It provides media content such as TV shows,  movies, and live channels via the internet to your streaming device. IPTV is a secure and reliable way for content consumption and is available to various platforms. It comes with a vast collection of channels and on-demand content from different countries.

IPTV usually requires separate hardware such as a set-up box to deliver content from the internet to your streaming device. However, if you are using a smart device like a PC then you don’t need a set-up box. The IPTV service is available on smart streaming devices like Amazon Fire Stick, Chromecast and Roku. So, if you are a Roku device user, then you can easily install IPTV. We will show you how you can install IPTV on a Roku device.

Prerequisites for watching IPTV on Roku

For installing IPTV, the first thing you have to do is enable the developer settings. So let us begin with developer settings.

Activating Developer Settings

Developer Settings is a necessity if you want to run IPTV on a Roku device. So, just follow the steps below to activate developer Settings.

  1. Switch on the TV and the Roku device.
  2. On the Roku remote press the following buttons in the order:
    • Home button: 3 times
    • Up arrow: 2 times
    • Left arrow: 2 times
    • Right arrow: 1 time
    • Left arrow: 1 time
    • Right arrow: 1 time
    • Left arrow: 1 time
    • Right arrow: 1 time
  3. Developer Settings will appear on the screen.
  4. Note down the IP address displayed on the screen.
  5. Now, look at the bottom right corner. If there is an option with the label Enable Installer and Restart, change it to Disable Installer and Restart.
  6. Scroll developer settings page and click on the “I agree” option.
  7. Now, you have to create a webserver password using the onscreen keyboard present on the display.
  8. After creating the password, click on the set password and reboot.

The developer settings part is completed here and now we have to install IPTV on Roku.

Steps to Install IPTV on Roku

Here is how you can install IPTV on Roku

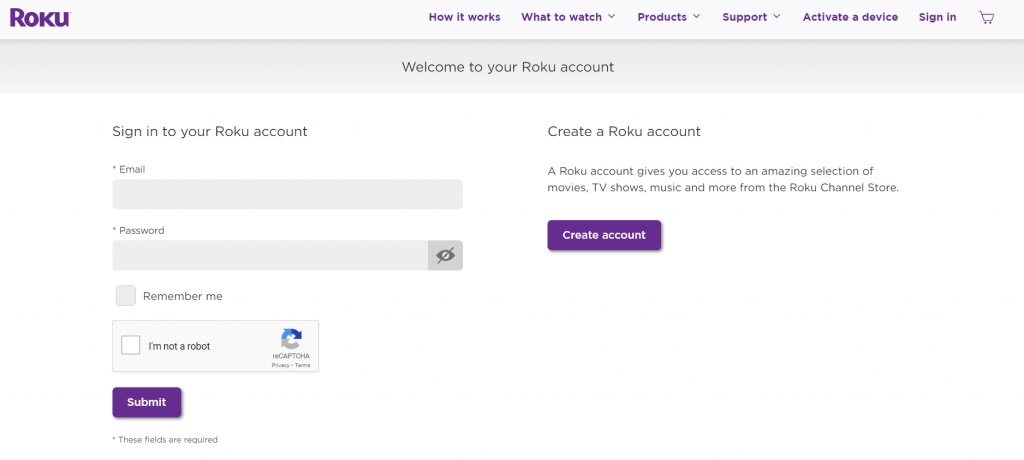
  1. Open the browser app on your PC and go to “my.roku.com“.
  2. Sign in with your username and password and click submit.
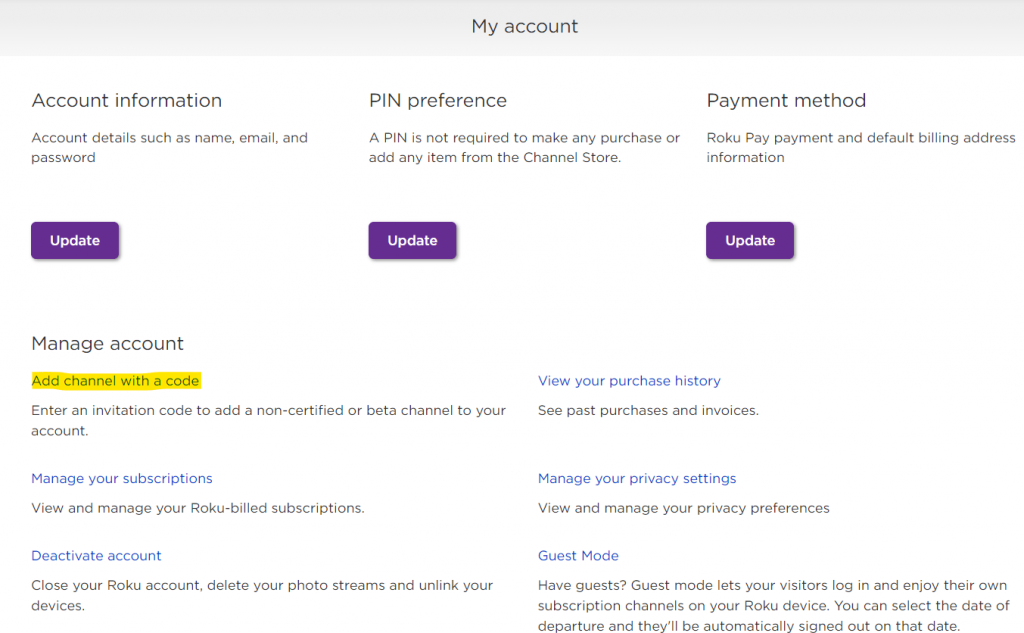
  3. Go to Manage account and click on Add channel with a code.
    roku add channel with code-min
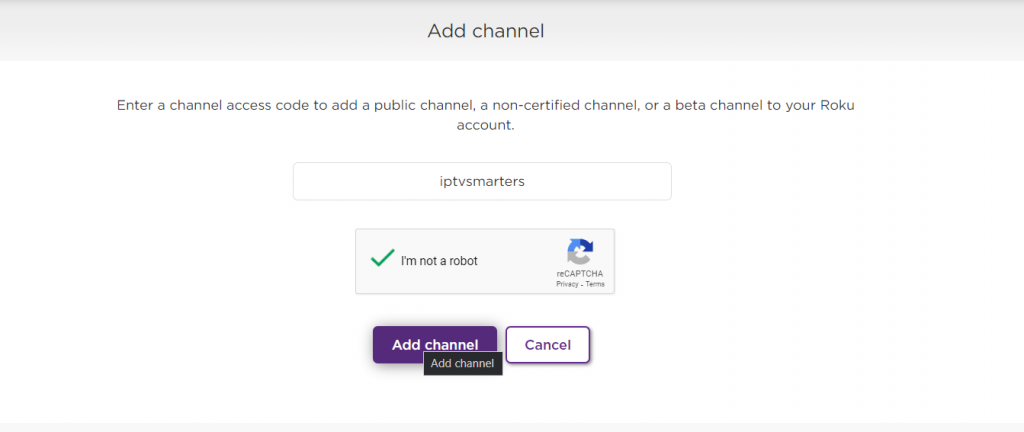
  4. Type the code “iptvsmarters” in the code box and click on Add channel.
    add channel roku 3
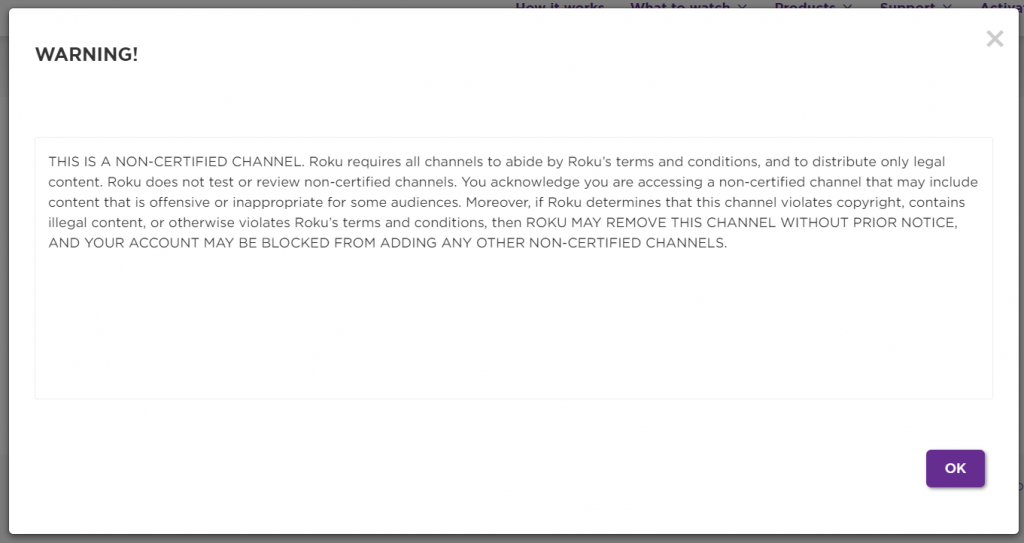
  5. A warning message will appear, just click on OK and move ahead.
    roku warning message
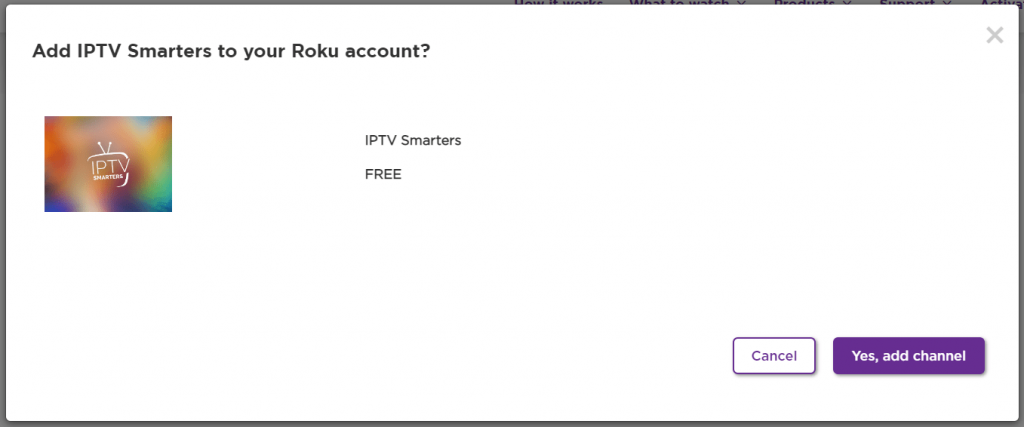
  6. Click on the Yes, add channel option. And the channel is added to Roku.
    roku iptv smarters

Now, you have added IPTV to your Roku device and now you have to install the package on Roku, Here is how you can do that.

  1. Go to the IPTV Smarters website on your PC browser.
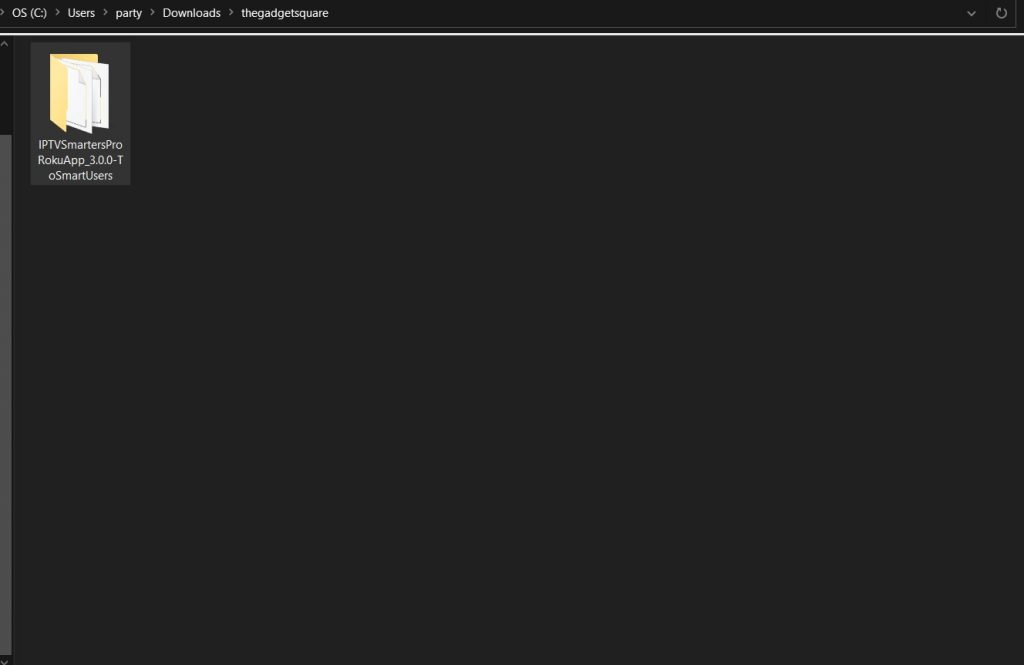
  2. Click on the download package and save it on your PC.
  3. Now, on the address bar of your browser, enter the IP address you saw on the developer settings page.
  4. A sign-in box will appear. Enter the username rokudev and the password you created on the developer settings page in the password box.
  5. Click on the Upload option present on the screen of your browser.
  6. Now, navigate to the saved IPTV smarter package on your PC and upload it.
  7. Next, you have to click on the Install option.
  8. Once the installation is complete, it will display Install Sucess.
  9. Now, open the Roku device, and the IPTV will be available on Roku, Enter your credentials to log in and you can watch IPTV on your Roku device.

You can install IPTV on Roku devices and use the service.

Best legal IPTVs for Roku

Peacock TV

Pluto TV

FAQs

Can I watch IPTV on Roku?

Yes, the users can easily watch IPTV on Roku following the steps above.

How can I watch IPTV on Roku?

You can easily watch IPTV on Roku by either mirroring your smartphone or following the above steps.

Is IPTV Free?

Some channels on IPTV are free, however, you have to pay to enjoy IPTV services.

The IPTV Smarters used in this tutorial is a genuine service, there might be many illegal services available for IPTV. We strongly oppose using illegal services and advise you to check the legality of the service before using it. However, you can use some VPN services on Roku to watch Geo-locked channels. If you have any issues while following our guide to install IPTV on Roku, then hit the comment section below.

How to cancel Paramount Plus subscription [Roku, Android, iOS, Amazon Fire TV, Web]

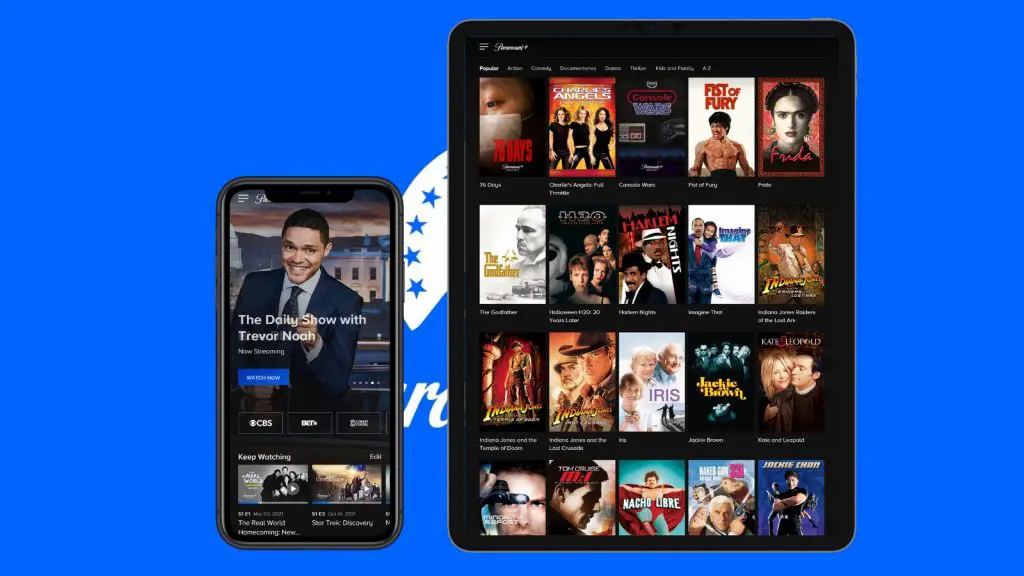
Paramount is one of the popular streaming platforms. ViacomCBS has relaunched its current CBS All Access subscription as Paramount Plus. Currently, they are available in Australia, Canada, Latin America, the Middle East (as a pay-TV channel), the Nordics, and United States. There are more than 450+ TV shows and 580+ movies to watch. Paramount App is available on Apple TV, iPhone and iPad, Android TV, Android phone and tablet, Chromecast, Amazon Fire TV, Roku and all other streaming devices and TVs. It’s also accessible to view on ParamountPlus.com through a web browser. The user interface of the paramount plus is similar to other popular streaming platforms. However, due to inadvertent circumstances, some users want to cancel Paramount Plus subscription.

cancel paramount subscription

Must See: How to watch Paramount Plus on Xfinity?

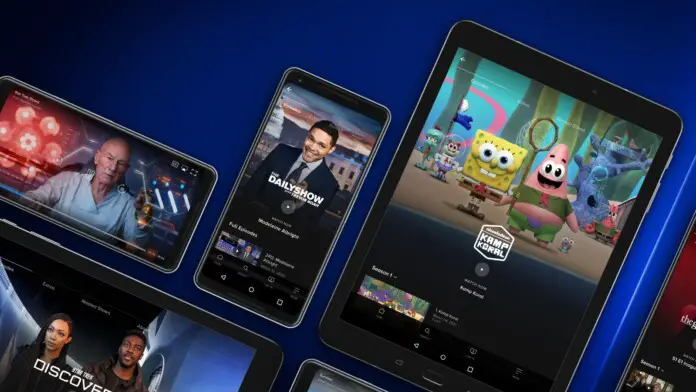
They have a budget-friendly subscription starting from $4.99 consisting of ads, and a premium subscription at $9.99. All paramount Plus subscribers will have access to Live feeds offered by the streaming service. But 4K streaming and offline downloads are available only for premium subscribers. Also, only premium subscribers will have access to the local broadcast channels. Children may be the ones who can draw maximum advantage from the subscription as SpongeBob’s CG-animated spinoff, Kamp Koral, Avatar: The Last Airbender, Paw Patrol, and iCarly are among Nickelodeon’s over 7,000 episodes that are available in the kids and family section.

Steps to Cancel Paramount Plus Subscription on Roku

If you have a Paramount Plus subscription on your Roku and want to cancel that as well, then proceed with the steps below.

  1. Using the remote control, go to the Home screen.
  2. Select the Paramount Plus channel icon and click the Star button.
  3. Click on Manage Subscriptions.
  4. Select Cancel Subscription and press confirm.

Hope you have cancelled the Paramount Plus Subscription from your Roku device using our guide.

Cancel Paramount Plus Subscription on Android

Must See: How to Watch Disney Plus on Roku?

If you subscribed to Paramount Plus using the Google Play store, you can cancel the subscription in the same place.

  1.  Open the Google Play app on your android device.
  2.  Click on the account icon
  3.  Select Payment & subscriptions.
  4. Click Paramount+ from the list
  5.  Select Cancel subscription and do as per the instruction.

Hope you have cancelled the Paramount Plus subscription from your Android device using our guide.

Cancel via Apple TV

cancel paramount subscription on apple

Follow these steps to cancel your Paramount Plus membership

  1. Open the Settings app on your Apple device.
  2. Click Users & Accounts.
  3. Select the account on which the subscription is to be cancelled.
  4.  Click on Subscriptions.
  5. In the Active section, select Paramount+.
  6. Click on Cancel Subscription and then select Confirm.

Hope you have cancelled Paramount Plus subscription from your Apple TV using our guide.

Cancel via iPhone or iPad

Follow these steps to cancel your Paramount Plus membership on iPhone or iPad devices.

  1. Open the Settings app on your device
  2. Click on the name at the top of the page.
  3. Select the Subscriptions option.
  4. Check on the Active List, and select Paramount+.
  5. Click Cancel Subscription and then select Confirm.

Hope you have cancelled the Paramount plus subscription from your iPhone or iPad using our guide.

Cancel via Amazon Fire TV

cancel Paramount Plus subscription

Follow these steps to cancel Paramount Plus membership if you got it through Amazon Prime on a Fire TV device.

  1. Open Amazon.com on a web browser.
  2. Click on your profile icon( your name and Accounts & Lists) in the top-right corner, and the dropdown menu will pop up.
  3. Select Memberships & Subscriptions.
  4. Click Manage Subscription present very next to Paramount+
  5.  Click the link under Manage Your Prime Video Channels.
  6.  below the Prime Video Channels list, identify Paramount+.
  7.  Click Cancel Channel and then confirm.

Hope you have cancelled the Paramount plus subscription from your Amazon Fire TV using our guide.

Cancel via the web

If you are using other devices like Smart TV or Gaming Console and you are finding it hard to cancel it. Then try this method.

  1. Open Paramount Plus on your web browser.
  2. Sign in to the account
  3. Hover over your account name on the top right.
  4. Click Account from the dropdown menu.
  5. From the Subscription & Billing section, select Cancel Subscription,
  6. Click on Yes, Cancel to confirm cancelling.

Hope you have cancelled the Paramount Plus subscription from the web using our guide. However, there might be some changes in the actual process, so we suggest checking the official documentation if the above methods do not work. Moreover, it would be difficult to avail free subscription offer once you cancel Paramount Plus subscription. If you have any queries, then do let us know via the comments below.

How to watch CBS Sports on Roku

CBS is one of the oldest TV channels available in the entertainment business. With the vast amount of TV content and live sports, the channel has become a primary choice for entertainment. CBS is available on multiple platforms nowadays and you can enjoy it on your Roku devices too. In this write-off, we are going to see how you can watch CBS Sports on Roku devices.

CBS Sports provides live sports and access to NFL games and other major sports events like the UEFA champions league. CBS provides users with CBS Sports Stream & Watch Live app to watch sports content on smart TVs. You can install the app on your Roku device to enjoy CBS Sports.

watch cbs on Roku

Steps to Watch CBS Sports on Roku

Roku is becoming a favourite choice among streaming devices, as it offers plenty of useful features such as Cloud DVR recording, the ability to stream channels, and mirroring across different devices.

How to install CBS Sports on Roku

CBS Sports Stream &Watch Live is available on the Roku Channel Store. So you don’t have to go through any complicated process to install it on your Roku device. Here is how you can do it.

  1. Switch on your Roku device.
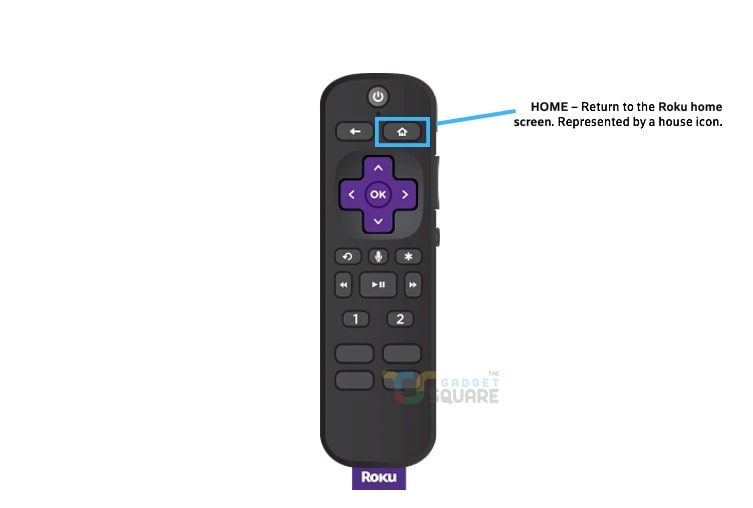
  2. Press the Home button on the Roku remote to access the menu.
    roku remote home
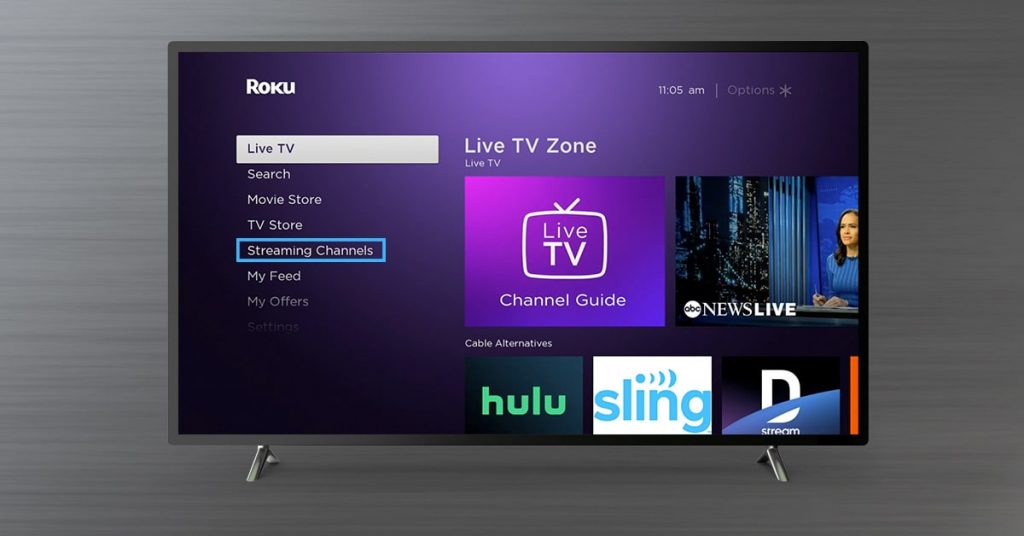
  3. Click on the Streaming Channels option on the menu.
    streaming channel roku-min
  4. Now, Search for “CBS Sports” using the search bar and on-screen keyboard.
  5. Select CBS Sports Stream & Watch Live from the results and click on Add Channel.
  6. After the installation is complete, go back to the home screen for activating the channel.

Note: You can follow our guide to add and remove channels on Roku for easy understanding.

How to activate CBS Sports on Roku

After the installation process is complete, the user has to activate the channel on the Roku device. Follow the steps below to activate CBS Sports on Roku.

  1. Open the CBS Sports Stream & Watch Live app on Roku.
  2. The sign-in page will be available to you with an alphanumeric code.
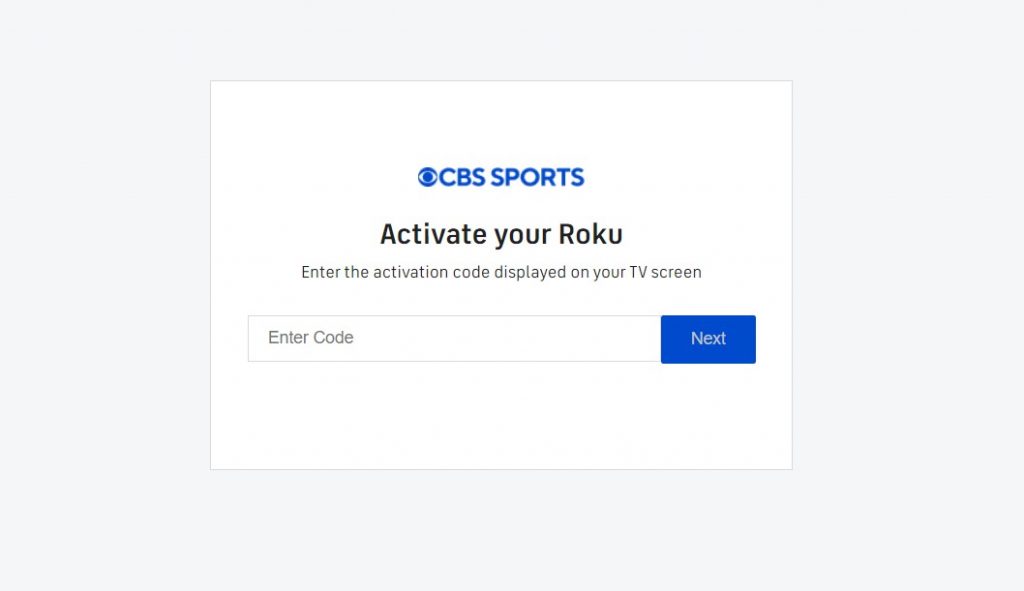
  3. Now, Open the “https://www.cbssports.com/roku” URL in a browser to activate CBS Sports Stream & Watch Live app.
    activate cbs on roku
  4. Enter the alphanumeric code in the activation code box.
  5. Sign in using your CBS Sports credentials and verify your Roku device.
  6. And now, you can enjoy CBS Sports on your Roku device just like any other channel.

This is all about installing and activating CBS on Roku devices. Hope the tutorial above helps you while installing, and we hope now you are enjoying CBS sports on your Roku device.

How to fix Roku Remote not pairing issue?

0

Roku is one of the popular American hardware digital media players. Recently, many issues have been reported while pairing the Roku remote. Since you are here, means you are also facing the same issue. Here’s our guide to fixing Roku Remote not pairing issue.

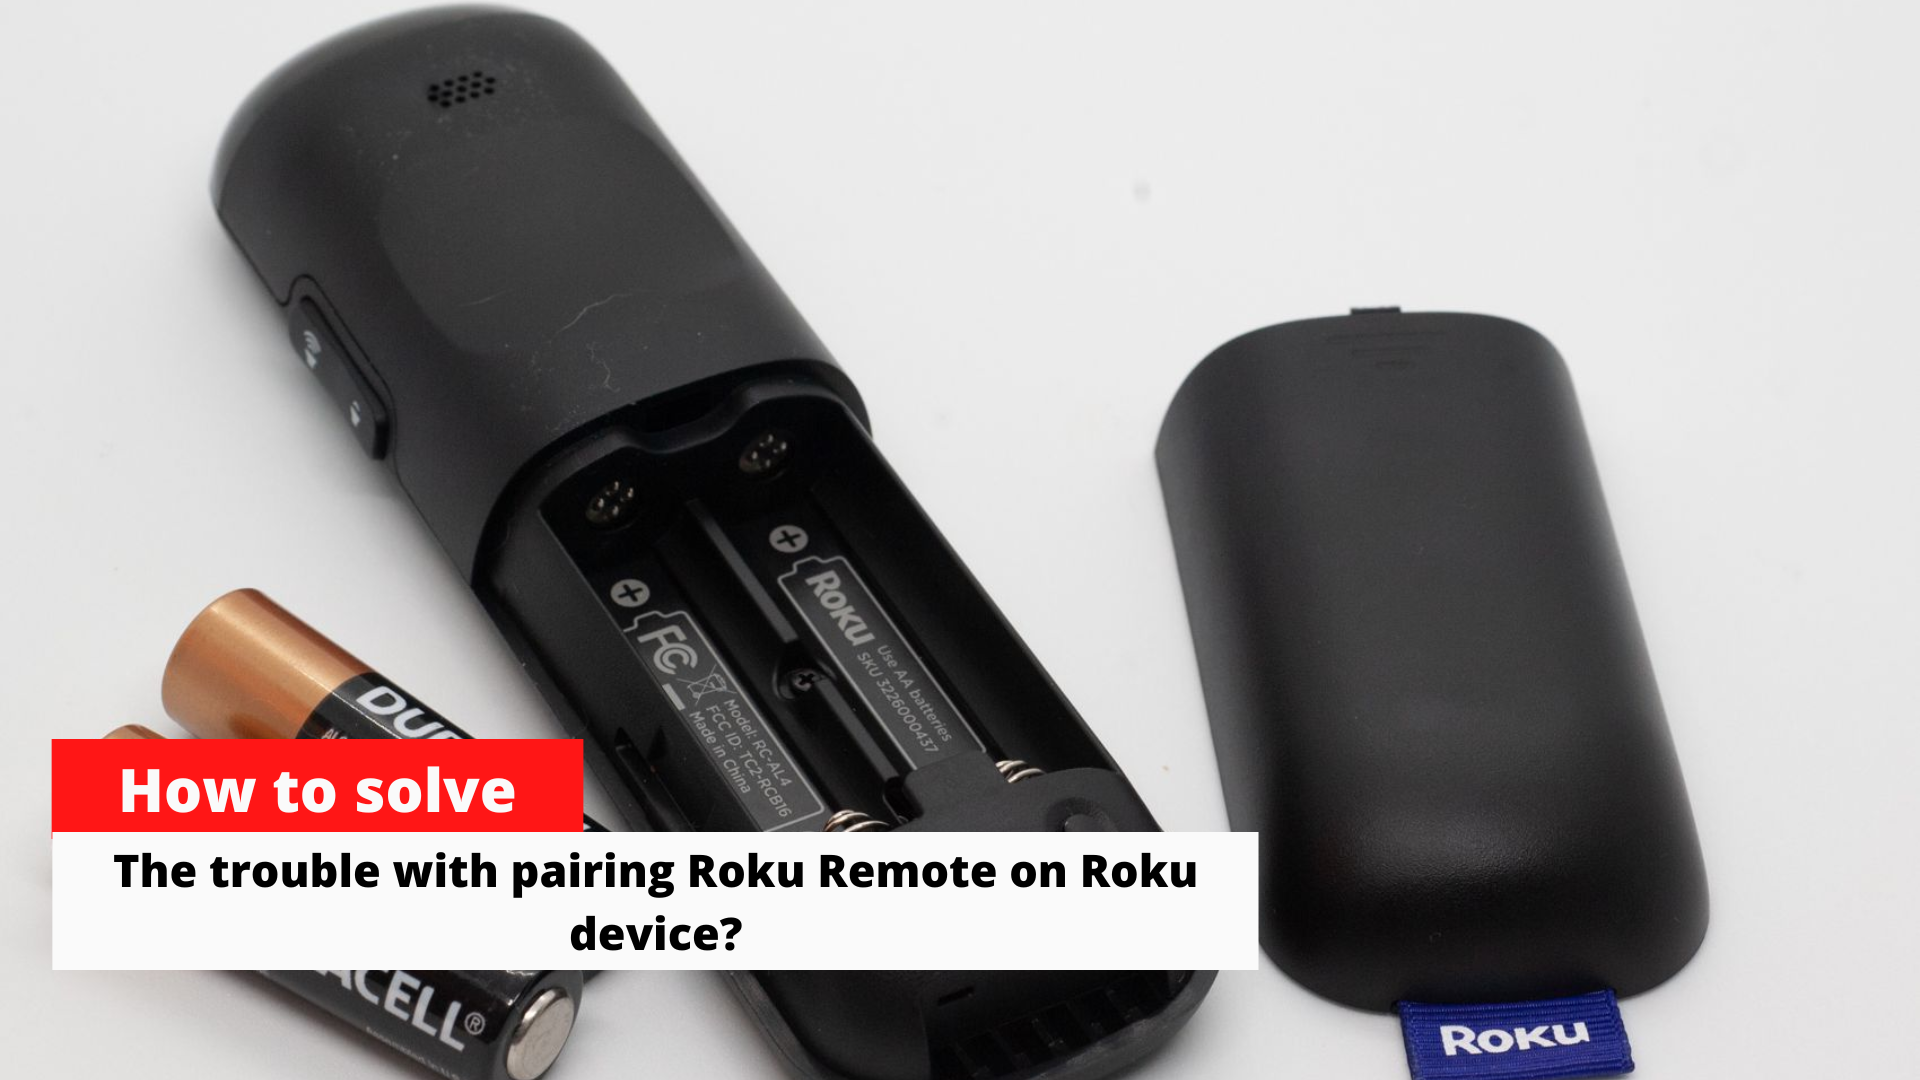
Trouble with pairing Roku Remote on Roku device

Must see: Best VPNs for Roku – How to setup VPN for Roku in 2022

Roku is becoming popular among streaming devices due to its magnanimous features. It offers to stream channels, mirroring across different devices, and even offers cloud DVR recording. You can watch channels such as Disney, NBC, ESPNPluto TV and Paramount Plus.

Before proceeding to fix anything, always make sure to check the basics. Follow the primary checkup points below to ensure whether the problem is simple or you need to pour more effort.

Primary check-ups to fix Roku remote pairing issue

  • Make sure you are at least 5 feet away. Otherwise remote cant work properly.
  • Check whether the batteries are correctly inserted or batteries are working properly.
  • Place your Roku device facing towards the remote side instead of keeping them behind the television.
  • If you are using a Roku simple remote then make sure there are no obstacles on the path between the remote and the device

If the above-mentioned solved your issue then, congratulations, and if not then it can be either a hardware issue or an issue regarding pairing the remote with a Roku device. Hardware issues can be rectified by consulting concerned authorities. There is nothing much we can do about it. But if it is a pairing issue, then try the following steps

Steps to fix Roku remote pairing issue

Re-pair the Roku remote

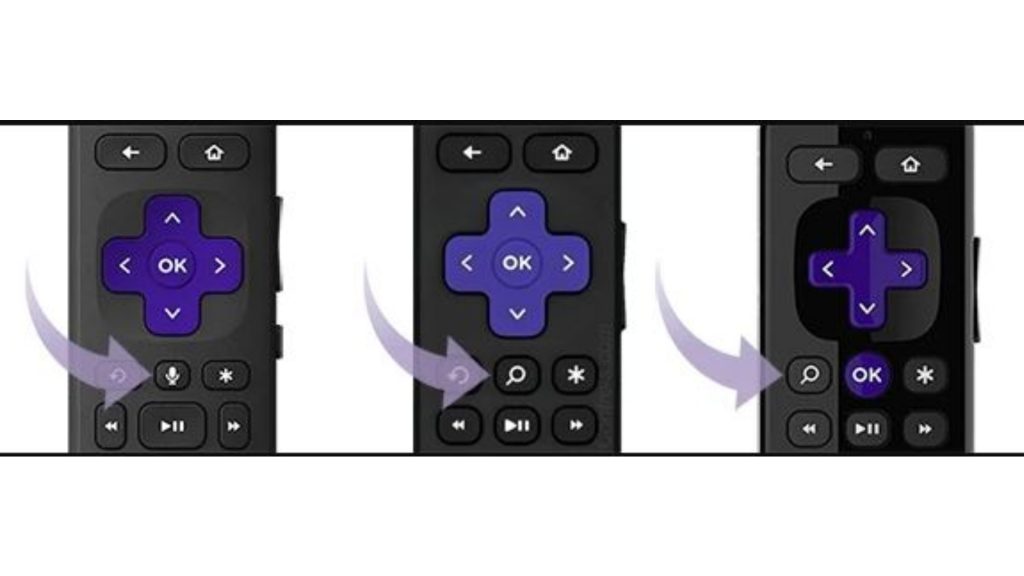
Before doing the step, identify the type of remote you are using. The initial steps are different but the rest are almost similar. Note: You can follow our guide for repairing the Roku remote.

Try to identify the Search Button from the remote. If you can’t find one use the voice control feature to open the search bar. If you are using a simple Roku Remote then you will find only the Search Button in it.

Trouble with pairing Roku Remote on Roku device?

  1. Remove the power source from the Roku device and wait for a few seconds and then supply power.
  2. Wait for the Roku device to turn on.
  3. Restart your Roku remote by removing and placing the battery back. If there is any flash of light then the battery is functional otherwise the battery is dead.
  4. It will take some time for the remote to connect with the Roku device.
  5. If paired then a notification will pop on the screen indicating the pairing.

Now you are good to go and test whether the Roku remote is working flawlessly or not. If not, then proceed with the steps ahead.

Another way to Restart the Roku device

  • Remove the battery from the Roku device and re-insert it.
  • Once the remote is paired Press the Home button on the remote.
  • Choose Setting.
  • Click Power.
  • Click on System Restart.

Other Practical solution

  • Consult the Roku support team and get their guidance.
  • If you are using an old Roku remote then it is advised to get the latest one which has tons of features and is worth the money.

We hope you have successfully connected the Roku remote to the Roku Device using our guide. If you still have any queries related to Roku remote pairing issue, then do let us know via the comments below.

How to Mirror Android, PC, iPhone, iPad, iMac to TCL Roku TV?

Mirroring your smart device display is quite a cumbersome activity sometimes if you don’t know the exact procedure. In this article, we will discuss how to mirror devices like Android, iPhone, PC, iMac, iPad etc to your Roku device.

Sometimes we need a bigger screen to enjoy content like movies and series, but they lack storage. So the content on our device cannot be copied to the TV system but we can use the Mirroring feature. Mirroring is the process of displaying the content from one display to another. And it can be done wired and wirelessly. However, the procedure is not hectic but stick till the end in order to avoid any confusion.

mirror to tcl roku tv

Must See: How to cast Zoom to Roku

Initial Setup

  • Make sure the Device and the Roku devices are connected to the same wifi network. (Check our Roku setup guide for help).
  • Sometimes we have to install third-party apps for mirroring.
  • Make sure the recommended apps are installed and good to go while doing this process.
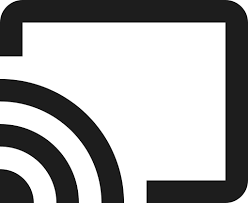
  • The following icon is known as the Cast icon How to cast Android, iPhone, iPad to your Roku Device.. We are going to use this word a lot in this article. So keep in mind.
  • Enable the Mirroring feature on your Roku device before mirroring. Here’s the procedure:

Enable Roku device for Mirroring

  • Open Settings using Roku remote.
  • Select System.
  • Click Screen Mirroring.
  • Now click on “Enable screen mirroring”.

Along with easy mirroring, there are several other benefits of Roku.

Mirror to Roku TV

The process to mirror to Roku TV may differ depending on different devices. We have listed procedures to mirror to Roku for each type of device.

Mirror Android to TCL Roku TV

Android offers plenty of ways to mirror the display on Roku TV. However, you can easily watch your favourite sport via ESPN or NBC on the Roku TV, or a movie from Disney.

  • Make sure, the Android and Roku devices are using the same network connection.
  • Goto Android Settings or open the Control centre and enable the screen mirroring feature on your phone.
  • Select the Roku device from the list.
  • On TCL Roku TV, select Accept in the pop-up window and the Android display will be visible on the TV screen.

Mirror from iPhone to TCL Roku TV

In order to replicate your iPhone display to TCL Roku TV, you must download a third-party app – Apower Mirror. It will aid in showing the iPhone display on bigger display.

  • Download ApowerMirror on both of your devices.
  • Open it on your iPhone.
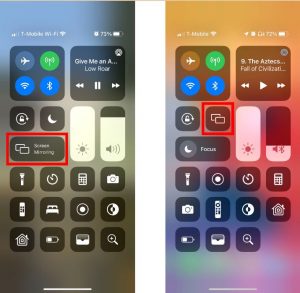
  • Open Control Centre.
  • Click Screen Mirroring.
  • Select your Roku device from the list.
    Or
  • Make sure you have set up AirPlay on your Roku TV
  • Select the Screen Mirroring option on your iPhone.
  • Select the content you want to Mirror.
  • Click on Share Button.
  • Select the device name from the list.
    Or
  • Open Control Center.
  • Turn Screen mirroring ON.
  • Select your device, and enter an AirPlay code displayed on the TV screen.
  • iPhone screen will be mirrored to TCL Roku TV.

Cast PC to TCL Roku TV

Make sure the PC has Miracast compatible hardware in order to do this. It is generally part of all the new PC hardware launched since past few years.

  • Search for wireless display on the search bar of the Start menu.
  • Select Project.
  • Click on the “Add a wireless display”
  • Select the Roku device from the list.
  • Follow a few instructions shown on the screen (which are not necessary)
  • The device will be added in a moment.
  • The casting will begin now automatically.

You can now do your work, or enjoy after casting PC to TCL Roku TV.

Mac to TCL Roku TV Mirroring

It is always a task to cast or mirror from Macintosh to a bigger display. However, the inbuilt AirPlay helps to mirror display to TCL Roku TV.

  • Enable AirPlay on the Mac computer.
  • To do this, go to the Apple menu.
  • Go to  System Preferences.
  • Press on Displays and look for Show mirroring options in the menu bar.
  • Tap the AirPlay icon.
  • Click on the TCL Roku TV.

You are good to go and enjoy your favourite show from Mac to a bigger display on TCL Roku TV.

Mirror iPad to TCL Roku TV

  • Download and enable the Screen Mirroring app on your Ipad.
  • Select the file you want to Mirror.
  • Click on the Screen Cast icon on the right top corner.
  • Select the Roku device from the list.
  • Mirroring will be started in a moment.

Now it’s all yours.

General FAQs related to mirroring on TCL Roku TV

Does my Android device support screen mirroring?

Screen mirroring is available on any Android device. However, the name may differ but the feature is always intact on all the Android devices. You can check for these names while searching for mirroring or casting on Android smartphones:

  • Smart View
  • Quick Connect
  • SmartShare
  • AllShare Cast
  • Wireless display
  • Display mirroring
  • HTC Connect
  • Screen casting
  • Cast

How to start screen mirroring from an Android device to Roku TV?

It is quite an easy process, always look for the above-mentioned names on your Android device. Generally, you can go to settings > Display > Cast screen to enable screen mirroring from Android device to Roku TV.

Can I share my photos with TCL Roku TV?

Yes, you can easily share your photos to TCL Roku TV using the Play on Roku feature using Roku Mobile App.

We hope you are successfully able to mirror to TCL Roku TV using our guide. However,  if you have any queries, then do let us know via the comments below.

How to watch Discovery Plus on Roku

If you are looking to watch Discovery+ on Roku, then you’re on the right page. Discovery Plus is an on-demanding streaming service owned by Warner Bros. They mainly focus on delivering original series and most of the contents are from the Discovery library. Discovery plus has around 24 million + active subscribers worldwide. They are famous for their shows like Selling the Hamptons, Scream The True Story, Mysterious Planet, Diners, Drive-Ins, and Dives, and many more. It becomes value-for-money to watch Discovery+ content on Roku TV aka on a big screen.

The premium subscription is $4.99/month which consists of ads and an ad-free subscription is $6.99/month. Currently, Discovery Plus is available in fewer countries. Discovery Plus is accessible on Apple TV, Android/Google TV, Roku, Amazon Fire TV, Samsung Smart TVs, Vizio smart TVs, Xbox consoles, Chromecast, and web browsers, as well as on iOS and Android mobile devices. Otherwise, you can easily cast Android to Roku.

get discovery plus on roku tv

How to Add Discovery+ app on Roku

It is a simple process we do to add a new channel on Roku. But, make sure to follow the procedure as it might be new for the newcomers.

  1. Open Roku Home Screen.
  2. Navigate to Search Channel and click on it.
  3. Type “Discovery Plus” on the search bar.
  4. Select the right channel from the results.
  5. Click on Add Channel and press OK.
  6. Select the Plan.
  7. Click on the 7-day free trial option.
  8. Create an account if you don’t have one otherwise log in with your login credential.
  9. Enter Roku Pin. Now the channel  will be added to your Roku device
  10. Now you can access Discovery Plus on the Roku device and start enjoying the show.

Sometimes it takes time for Roku to show the downloaded channel. The regular updating feature of Roku will solve that issue.

If you want to update Roku then

Sometimes, it becomes necessary to update the Roku firmware to enjoy the new services. For Discovery+ also, the users who are using old devices might have some difficulties viewing Discovery Plus on Roku. They should update the update.

  1. Go to Settings.
  2. Click on system
  3. Click on System Update.
  4. Select Check Now.

Now the Device will find the latest update and the issue will be resolved.  Even though Discovery Plus has great compatibility with Roku devices sometimes they won’t work.  In those cases try to make sure that the device is compatible or not. If not then upgrade your device to enjoy shows in the future without any trouble.

How to Get Discovery+ from Roku Website

In case, you have easy accessibility to the Roku website, then you can add the Discovery+ channel from Roku Website.

  1. Head over to the Roku Channel Store from your favourite browser.
  2. Search for “Discovery Plus” and press enter.
  3. Click on “Get Details” and then hit ” +Add Channel”.
  4. Te Discovery Plus will be added automatically to your Roku if you have the same account signed in.

General FAQs for Discovery Plus and Roku

How much content is available on Discovery Plus?

Discovery Plus offers around 70,000 episodes from networks such as HGTV, Food Network, TLC, Travel Channel, Discovery Channel, and Animal Planet, as well as Discovery Plus’s unique programs. They have around 60,000+ episodes and 2,500+ shows. Having a Discovery Plus subscription will benefit academically for students. New series are being added on a regular basis, ranging from lifestyle and true crime to home repair, gastronomy, adventure, and more. If you are planning to take one then go for it.

Do old Roku devices have problems while watching Discovery Plus?

Yes, some old Roku devices might not be compatible with the new channels. However, you can always check for new updates. However, you can check Discovery+ compatible device list for compatibility.

Is Discovery Plus available around the globe?

No, Discovery Plus is limited to some countries. However, you can use a VPN on Roku to enjoy the Discovery Plus content seamlessly across borders.

Can we record Discovery Plus content?

However, legally it is not possible, but for your personal consumption, you can use any Cloud DVR service for Roku to enjoy the show later on.

We hope you have successfully added the Discovery Plus on Roku using our guide. If you have any queries, then do let us know via the comments below.

Google Chromecast HD with Google TV surfaces on FCC, could launch soon

In the recent FCC listing, the Mini version of the Google Chromecast has been spotted with the model name G454V. It will be a low-end or HD version of Google’s wireless device Chromecast. It looks like the new device will be having support upto 60 Hz refresh rate and up to 1080p resolution.  The device will also support Bluetooth, 2.4GHz + 5.0GHz Wi-Fi, a controller, and USB charging. However, the device in technical supports three running modes of 1Mbps, 2 Mbps, and 3Mbps bandwidths.

Chromecast HD with Google TV

While the listing doesn’t specifically state that it’s a streaming dongle or Chromecast, the FCC document’s accompanying connection diagram of the test system does. From its test diagram, it is clear that the device isn’t connected to any power source. Also, they are controlled by a remote controller.

Also, the Chromecast HD with Google TV will be powered by an Amlogic S805X2 CPU with Mali-G31 GPU, according to earlier sources. It may also have hardware decoding for the AV1 video codec, which is currently unavailable on the Chromecast.

The device’s inclusion on the FCC usually signals it’s getting closer to release, but we haven’t heard anything from Google about it yet.
It was rumored that Google will be launching a budget version similar to Chromecast with Google TV which will be coming with lower resolution specifications. The current model supports AV1 video codec with 4k HDR streaming while the previous one didn’t support AV1.

Google just added 12 more territories to their current 4K Chromecast with Google TV, including Europe. It’ll also be available in India and a few other Asian countries.

Source: GChromecast Hub

Cloud DVR on Roku: Record movies and TV shows

Having DVR (Digital Video Recording)abilities on your live streaming service is a must these days as people don’t have time to watch their favourite shows anymore. And even if they have the time, no one can watch everything at a time. So, DVR helps in recording the show and watching it later.  This means you don’t have to wait for commercials to go to the bathroom or chose between two shows at the same time. Just record one while watching the other one. Based on the technology, you can try Cloud DVR on Roku for better benefits while watching TV.

Modern-day DVRs are a bit different from the traditional ones as you don’t have to depend on the inbuilt storage of your device. The new DVR technology is cloud-based, which means all the recorded data is stored on cloud storage. The new cloud DVR storage provides better storage and you can always increase it by paying extra.  So, the limited storage problem does not exist anymore.

Cloud DVR on Roku

In our guide, we are going to show how you can use cloud  DVR on your Roku device. Roku has been a great success in the streaming media players industry due to its several advantages and is one of the best streaming devices.  So, let us see how you can use DVR on Roku.

Top 5 channels with cloud DVRs on Roku

Roku does not come with an inbuilt DVR capability, however, it can still connect to the cloud storage online to store the data. Roku uses the cloud storage offered by different streaming services like YouTube TV, Sling TV, and others to store the recorded content. But, you can’t store the content from any channel, for example, YouTube TV will store only the data from the show recorded on YouTube TV only. So, let’s see which services can you use for using DVR on Roku device.

DirecTV Stream

The service was previously known as AT&T TV and was sold by AT&T later. It is the oldest live streaming service and provides the highest number of channels available on any streaming service. DirecTV Stream provides unlimited DVR storage to users on their base plan which starts at $70 per month. You can store the recorded content for up to 9 months and up to 30 episodes of a single TV series.

YouTube TV

YouTube TV is a famous live TV service in the US as the service is not available in many countries currently. It is a newcomer in the live TV streaming industry but offers the best value for money. It also offers the ability to use cloud DVR storage to store data for 9 months. And just like DirecTV Stream, YouTube TV also offers unlimited cloud storage. However, the content and channels available on YouTube TV are less than DirecTV Stream. YouTube TV starts at a price of $65 per month and you can subscribe to add-ons provided.

Hulu with Live TV

Hulu also offers the live TV streaming option to users and it starts at $65 dollars for the normal version with ads. You can also opt for the version without ads at a price of $70 per month. Hulu offers a total of 50 hours of storage on cloud DVR and it can be kept for 9 months just like the other services above. You can increase the storage to 200 hours by buying an add-on for $9.99 per month.

Sling TV Free and Paid DVR

One of the most budget-friendly options for Live TV streaming is Sling TV. It offers the cheapest plans in the market and with every plan you get 50 hours of DVR storage. This storage can be increased to 200 hours at a price of $5 per month. The best part about Sling TV DVR is that there is no time limit, the data stored in the cloud will be available as long as you keep your subscription. And if you decide to pause your subscription, the data will be kept for 30 days in case you want to resume the subscription.

fuboTV Cloud DVR

fuboTV is also one of the budget-friendly services and is great for sports lovers. The service offers 250 hours of cloud DVR storage at $9.99 per month and can be upgraded to 1000 hours at $16.99 per month. The service provides 1000 hours of cloud storage on their Pro and Elite plans. You can also access the games on the past 3 days using the lookback feature on fuboTV.

Conclusion – Your Roku device for Cloud DVR

The users can enjoy the recorded content under the My Stuff section on Roku. These are the famous streaming services you can opt for on your Roku device for cloud DVR storage and record your favourite shows to watch them later. YouTube TV comes out to be a better option for normal users but, you can also go for other options depending on your usage.

If you’re looking to watch US-based content on YouTube TV or any other streaming service, then you should check the best VPNs for Roku to enjoy flawlessly. Hope the article helps you in deciding how you are going to access cloud DVR on Roku device.

However, there are multiple benefits of cloud DVR on Roku. The user can seamlessly enjoy the content anywhere and anytime. What benefit most attracts you in case

How to Cast from Android to Roku TV

Mirroring or Casting is the process of projecting content from one display to another. They are mainly for presentation, watching movies, or otherwise to get access to one another devices. If you’re also looking to cast from Android to Roku TV, then you’ve landed at the right page. There are several ways to cast from Android device to Roku TV.

Before beginning the process one should know whether they want to cast or mirror the device. The function of both the features is to project the screen onto another one. But they do have some significant changes.

cast android to roku tv

Must See: How to listen to Pandora on Roku?

What is the Difference between Casting and Mirroring?

Both work as wired or wireless and the function looks more or less similar too. But they do have some differences.

Casting : 

  • Here one device will be able to gain the access to the other one and control it.
  • We can keep one screen idle and the other one is functional.
  • We can decide what to play on the other screen.
  • Every app doesn’t support casting.

Mirroring : 

  • Here the whole screen of one of the devices will be mirrored onto the other device.
  • The primary device has to be functional, otherwise no use.
  • Everything on the screen will be mirrored here.
  • The compatibility of the app is not an issue.

Steps to Mirror Android to Roku TV

As said above, Mirroring is quite different from casting, so make sure you’re following the correct procedure before proceeding.

Initial Setup

  1. Make sure that the Android device and the Roku devices are connected to the same Wifi network. (Note: You can easily setup the Roku device with your network.)
  2. Not all Android devices support Mirroring. Make sure your device supports it, and if not then you can download the following alternative apps from the Playstore.
    • Chrome Remote Desktop
    • Google Home
    • Microsoft Remote Desktop
    • TeamViewer
    • Your Phone Companion
  3. Ensure that the mirroring process is enabled on your Roku device. If not then follow the following process to do that.
    • Enable Mirroring on Roku
      • Click the “Home” button on your Roku Remote.
      • Open “Settings
      • Select  “System
      • Click “Screen Mirroring”.
      • Select “Screen Mirroring Mode“.
      • Choose the necessary setting.
  4. Make sure that you are clicking on the prompt setting and press confirm in order to confirm the screen mirroring.
      • Press OK at the end.

Procedure to start Android Mirroring on Roku TV

  1. Open Setting on your Android device.
  2. Click Share and Connect.
  3. Select Miracast.
  4. Turn it ON
  5. Select your Roku device from the list.
  6. A notification will pop on your screen asking permission for mirroring. Click allow or always allow according to your preference and press OK.

You are good to go and enjoy content on Roku via different streaming platforms such as ESPN, Pluto TV, NBC, Disney Plus, etc. However, if you get any issues, then you can head over to the official Roku support documents.

How to disconnect mirroring on Roku TV?

  1. Open Settings.
  2. Select Miracast on your android device.
  3. Click on the device that needed to be disconnected.
  4. Click ok on the disconnecting option.

How to Cast Android to Roku TV

Initial setup

  • Make sure that the device you are using has a screencasting feature. If not then there are apps like Team Viewer, Google Home, AnyDesk, etc on Playstore which will help you in casting screens onto the respective device. After installing follow the below-given steps

Procedure to cast Android to Roku TV

  1. Click on the Cast Icon (refer to the figure below) on your Android device to enable casting.

    Cast Icon
  2. Select the Roku device you want to cast.
  3. It will take some time to start casting. (Connecting icon or something similar will be shown on the screen).
  4. Once the work is done click on the Disconnect icon on the Roku device using the Roku remote. Or you can disconnect it from the android device too.
Quick tip
  • Once the device is connected you can control the media player using your phone to adjust the content you are playing.
  • You can also use the Roku remote to adjust the brightness or volume. (Note: In case Roku Remote is not working then try to reset and repair it with the device.)

Cast Android to Roku TV  FAQ

Do both devices have to be on the same network while casting?

Not necessarily, but some apps may limit their use.

Is casting safe?

Well, it can be misused. Make sure you don’t fall into the wrong hand. Don’t give unnecessary permission access to the device. If you find any abnormality check the connected device on the setting. Prevent unauthorized network access.

Can we mirror using Bluetooth?

Yes. The latest Roku device has that feature.

Is screen mirroring safe?

Yes. Here the device creates encryption between them which makes it hard for hackers to get in.

We hope our guide to mirror or cast Android to Roku TV is helpful for you. If you have any queries, then do let us know via the comments below and keep following us for more content like this.