How to Add and Remove Channels from Roku

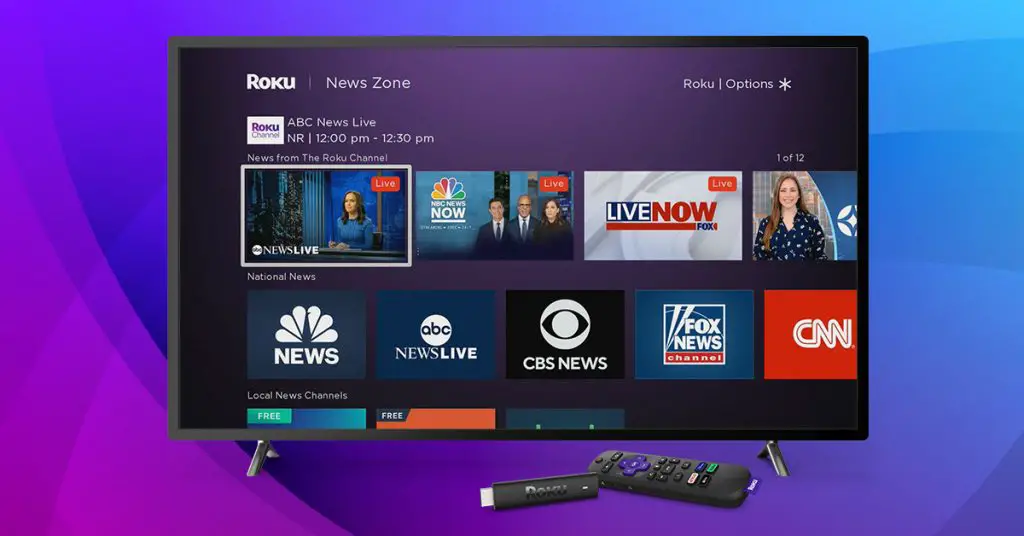
The Roku device offers free TV, Roku Originals, and other paid content. The streaming device is able to access and manage all the favourite streaming services in a single place. Roku is a practical solution for converting smart TV into an even smarter one that offers an easy setup. Although Roku devices come with some preloaded channels (apps). But, you’ll undoubtedly want to add more to access your media and delete others so that your home screen isn’t cluttered. If you want to add or remove channels on Roku, you can do so by following the below article.

add or remove channels roku

It’s been quite some time since Roku started gaining market traction due to several pros over other streaming devices. Roku has become a trendsetter due to its ability to add channels manually. It is quite easy to set up the device and add and remove channels.

Steps to add a channel on your Roku Device

  1. Press the Home button on your Roku remote.
  2. Scroll and select Streaming Channels.  (Now Channel Store will open)
  3.  Enter a keyword in Search Channels and select the required channel. (On the top you will find the featured and popular channels.  ).
  4. Click OK to learn more about the channel
  5. If the channel is “free” then you click Add Channel to download the channel on your Roku device.
  6. If the channel is “paid”, then you have to click Buy in order to purchase and install the channel.
  7. If you have a Roku account PIN, then enter it.
    If your payment information is out-of-date, it will need to be updated in your Roku account and it will be explained in another article.

To remove the channel on your Roku Device

There are two ways to remove the channels depending upon the need. To remove channels from the listing and to remove channels from the store. Understand the need and find the suitable one.

To remove a channel from the listing

  1. Press the Home button on your Roku remote.
  2. Scroll to the right and highlight the channel you want to remove.
  3. Click on the Star or Asterisk  (* ) button on your remote to open the options menu.
  4. Click Remove channel and click confirm.

To remove a channel from the Roku Channel Store

  1. Press the Home button on your Roku remote.
  2. Select Streaming Channels to open the Channel Store.
  3. Find the channel you want to remove and click the OK button on your remote. (A indication will pop right bottom noting that its an installed channel)
  4. Select Remove channel and click confirm.

Points to keep in mind

  1. You can access the channel till the current billing cycle finishes if a subscription is cancelled before the end of the payment period.
  2. Roku.com does not allow you to uninstall channels.

We hope you have successfully Added or Removed channels on the Roku device using our guide. If you have any queries, then do let us know via the comments below.

Peacock TV brings Menu Options in a new UI overhaul

0

Peacock is an America OTT streaming platform owned by NBC Universal. The tiled interface of Peacock looks similar to other streaming services but unlike those, it has a version that is completely paid and free and consists of live news, sports, movies, and original series. NBC Universal used an ad-supported tier that enables users to get free content and access to unlimited NBC shows, originals, and live tv programming. A new UI update is here for the Peacock with several new additions that enhance the user’s usability.

Image credit: Peacock
Must See: How to setup Roku Streaming Device?

Peacock announced a few modifications to the streaming app when presenting to advertisers at the NewFronts conference on Monday. First, as part of its English Premier League coverage, Peacock unveiled a new tool over the weekend that let viewers catch up on a match by seeing important plays. Following that, the service announced its first three original movies through a deal with Universal Pictures. Lastly, Peacock has become the official day-after-air streaming home for all of Bravo’s content, as the buzzy cabler switches its programming from Hulu to Peacock.

Image credit: Peacock

Must See: How to setup Amazon Fire TV Stick

Peacock is updating their user interface which will be providing more information and a complete viewing experience. It will replace the horizontally appearing menu option and will include a new vertical navigation panel on the left side of the screen which will show the details of what other streaming services are offering. The user can find more content via search, category hub, and content-specific verticals.

Instead of the “More Info” button for the description, they are introducing more information into the carousel for each individual title. Instead of the title card, there will be a short synopsis of the title helping the user to decide whether to watch it or not. There are other minor updates like the cast, director, rating, etc will also be available on the more info button.

How much does Peacock premium costs?

However, not all the shows on it are for free. Example SNL – the most recently aired shows and movies won’t be immediately available for free. One has to get a premium to enjoy that privilege. The premium membership starts at $4.99 per month and $50 per year and for premium plus membership starts at $10 per month and $100 per year. Even with premium, there are ads and also there are no offline downloads feature which is something we felt odd.

Is Peacock really available for free?

There are shows like Superstore and The King of Queens which is available exclusively for all members. Some are limited to the first 2 season can be enjoyed for free, and the rest are on Premium. There are more than 20 million active users until Q2 2021 and 9 million are paid subscribers.

Is Peacock premium worth paying for it?

If you are a big fan of NBC’s stable of shows or enjoys live streaming of the Olympics or like watching past hit movies and are okay with spending an extra 5 dollar or are comfortable with watching an ad in the middle then the Peacock premium is a perfect option for you.

How to setup Roku Streaming Device?

Roku is a trending online streaming platform in America founded by Anthony Wood. Roku allows you to access multiple streaming platforms and manage them all in one place. It allows you to access 500K+ movies and TV episodes. It is a brilliant device that converts smarter TV even smarter. Roku keeps tabs on previously watched episodes and pops notifications if there is any update. The minimalistic UI and organized menus make Roku friendlier than any other current streaming platform. However, there are several advantages of the Roku streaming device that makes it compete ferociously against the competitors. You can easily setup Roku Streaming device following our detailed guide.


Note: Survey was conducted in Q1 for all years other than 2015 (Q2).Source: Parks Associates, American Broadband Households and Their Technologies: Multiple Surveys. A sample size of 10,000.

Roku allows to download and install preferred channels and later can be deleted too. In the beginning, Roku struggled to get placed in the market because of the flooded competitors but now they are making a great breakthrough. According to the survey in the fourth quarter of 2021 Roku reported a total of around 60.1 million active users in the United States and still growing.

Must See: What is Roku – Pros and Cons against other streaming devices

Roku availability

Currently, Roku is available in US, Canada, and the UK and will be soon available in other European countries too. We can access Roku from another region too but that will be explained in another article so stay tuned. Roku’s founder is working on companies content ambition to broaden the content availability.

Roku is an easily operatable device after initial setup. Moreover, setting up Roku is also an effortless process, and you can follow the steps mentioned below to complete the Roku setup.

In Box contents of Roku Stick – Each box of Roku contains an HDMI cable, power adapter, Roku remote, and MicroUSB cable.

Steps to Setup Roku Streaming Device

Initial Setup – Prefered Language and Wifi Setup on Roku

  • There are different ways one can access Roku (Roku box, streaming stick, or TV), but the procedures are the same.
  • Before installing Roku make sure that your  TV is compatible with the device.
  • If you have a 4K enabled Roku device then make sure that the TV has  HDCP 2.2 compatible. It will be mentioned in the box. Also, make sure you have a fast internet connection to fully enjoy 4k streaming.
  • If you have a Roku 1 or Express Plus, then connect the Roku box to a TV using composite video and analog audio connections. Because this is used only for analog TVs.

Final Setup – Connecting Roku Account and Parent Control Settings

Once you have done the initial preparation follow the following steps.

  1. Using the HDMI port connect the Roku device to the TV, (if you have a Roku TV then simply turn it on.)
  2. After connecting turn the device on. A booting window will appear now following the Roku company logo.
  3. Now select the language and country. (while choosing a country make sure you choose the preferred country because some shows aren’t available in every country.)
  4. Internet access is enabled by connecting the Roku stick to the router and connecting to the network. (If you are using a Roku streaming stick then you have only a wifi option. If you are using a Roku box or Roku TV then you have the privilege to use both wifi and Ethernet)

    roku streaming device
    Image credit: Roku
  5. Once the device connects, a window will appear asking to update the software.
  6. Create a Roku account by signing in through  Roku.com through PC or laptop and entering the code number.

    activate roku streaming device
    Image credit: Roku
  7. Now a message will pop on your TV screen saying “Your Roku device has been activated”
  8. Using the arrow key on the remote you can scroll through the tv and access your favorite channels. Since the UI is so simple this part won’t be a headache.
    Setup Roku Streaming Device

Pairing Roku Remote and adjusting TV Resolution

There is no need of setting up the Roku remote as it will work automatically. If you are using Roku enhanced remote then do the following changes by heading to Settings > Remote > Set up Remote For TV Control.

Roku will automatically detect the resolution and aspect ratio of the TV as it is connected to and it can be changed manually from the settings. For Roku TV, these settings are predetermined and cannot be altered.

We hope you have successfully paired Roku with the TV using our guide. If you have any queries, then do let us know via the comments below.

What is Roku? – Pros and Cons against other streaming devices

0

Ever wondered about accessing all your favorite online streaming platforms and managing them in one hub? Roku enables you to stream your favorite content from several free and paid streaming channels all in one. With over access to 500K+ movies and TV episodes, Roku is becoming a favorite streaming device in North America. It ensures a practical solution for turning your smart tv even smarter with a better viewing experience.

what is roku
Roku logo for representation purposes
Must See: How to setup Amazon Fire TV Stick

Roku Streaming Device

The name Roku means six in Japanese because it was the sixth company launched by its founder Anthony Wood. During a pandemic, Roku gained more than 2.9 million active accounts. It comes with a multifunctional remote which allows users to interact with the system more efficiently than any other device. The intuitive UI helps in easy accessibility across its exciting features and also it provides excellent 4K HDR quality with Dolby Vision. Roku requires minimal setup and connects to the internet as normal TV does. You can easily access all the services and features by making an account on Roku. However, the users have to get a subscription to the corresponding streaming service.

Roku Advantages and Disadvantages

Every choice comes with a consequence so let’s discuss its pros and cons now.

Pros

  • All in one place – The convenience of getting all the content in a single place is a nifty advantage.
  • User-friendly Interface – The simple organized and minimalistic UI offers easy accessibility to users instead of clustered options.
  • Cheap and affordable – Roku streaming player subscription starts at $29.99. However, you can enjoy the free content always without any subscription.
  • Keeping a tab on previous shows – A notification pops when there is any update on TV shows the user usually watches. There are plenty of useful features which enhance the usability of the overall stick.
Image credit: Roku

Cons

  • Non-Compatible – Everything in a Single Unit – It isn’t compatible with a few of the TV models which is something they can fix in an update.
  • Frequent Updates: When speaking of updates, it consists of auto-update features that do allow access to the content while updating.
  • Everything in a single place – Its major advantage itself is its disadvantage, as accessing all the content in one place may sound cool but at the same time, it makes it crowded too.
image credit: Roku

So if you ask us that one needs a Roku we would say no unless you are the one who watches a lot of movies and web series. Go through some of the popular streaming services and find a couple of the best that suits your requirement. We hope you got to know what is Roku and its advantages and disadvantages over other streaming devices.

How to use the Sticky Notes in Windows 10

Note making is the easiest and absolutely a perfect way for completing all your important tasks and projects on time along with the reminders. With your work schedule, sticky notes are a very powerful tool that helps you in managing the tasks you would like to complete in a day.

Sticky Notes in Windows 10

You might be not aware of this simple application in your Windows 10. Let’s use this little but very helpful application inbuilt in Windows 10. Any kind of reminders for your daily requirements, office tasks, birthdays, etc can be created using these sticky notes.

How to Use Sticky Notes in Windows 10

Now, let’s start working on this by finding it first. Before using it, finding out this application is important and quite easy.

  • Go on your Start Button and type in Sticky Notes.
  • You view the Sticky Notes in the option, so select the option.
  • To make it view on your desktop, Right Click on the entry in the start menu and tap on the option of Pin this program to taskbar.
  • Right-click on the pinned and select New Note to create a new note quickly.
  • Adding and Placing New Notes

As you see these square-shaped little sticky notes are small in size that holds the capacity of concise data. You can add many such small notes on your desktop just by clicking on the’+’ sign on the left side at the top of the sticky note. Either you can directly press ‘Ctrl+N’ to get the new note.

To place or manage them on your display is another simple task, as you can drag and drop them according to your way. Just go on the top Yellow portion of the note to move it where you want.

Customizing and Cleaning of the Notes

To avoid any kind of confusion in the scattered notes on your desktop, customizing it is definitely a good idea. As you can change the colors of the notes according to your choice. Right-click on the sticky note and choose the color of your choice.

Related: Best Typing Software for Windows

After using any particular sticky note it is necessary to remove it to clean up the mess from your desktop. To delete any used sticky note simply click on the top of the Trash or Cross sign. Otherwise directly press ‘Ctrl + D’.

I hope you can definitely use these little sticky notes easily after reading this article and quickly manage all your official, as well as daily, need basic tasks.


Best 3D Glasses available in India for purchase

0

As you know 3D glasses are used to view 3D content in a 3D compatible TV’s or displays. Big TV manufacturers such as LG, Sony, Panasonic to name some have already developed their 3D featured Televisions. However, for experiencing the 3D content, need of a suitable 3D glass is inevitable (auto-stereoscopic being an exception). Usually, the 3D Glasses are bundled with the television by their respective manufacturer itself, properly optimized to work together. So, that users can enjoy flawless viewing experience of 3D contents.

Types Of 3D Glasses

They are classified into Passive Glasses and Active glasses.

  • Passive 3D Glasses: As the name signifies, these type of 3D glasses do not require power for imparting 3D visuals to our eyes. Achieved by a pair of orthogonal polarizing filters. Our normal 3D Glasses that we get from theaters are usually passive.
  • Active 3D Glasses: Being costlier than passive glasses uses battery-operated shutter glassesRapid opening and closing of shutter is what leads to the 3D viewing of contents.

Active and Passive Glasses have their own merits and demerits and may differ from person to person. I am not going deep into decide which one is better and which is not.

Here, let us have a look at some of the best 3D Glasses available in India. The listing could be helpful if your 3D glass is not working as expected or lost somewhere, and going to purchase a new replacement.

Sony TDG-500P Passive 3D Glasses

The Japanese MNC known for its reputed BRAVIA TV series, has got their own custom 3D Glass for its 3D TV. The Sony TDG-500P is a Passive 3D Glass and is compatible with all most all Passive displays manufactured by Sony so far.

TDG-500P is light-weight and comfortable. For hours 3D content can be seen without any irritation and discomfort. It consist of a USB port.


Buy from Amazon India

LG Cinema 3D Glasses AG-F310

Cinema 3D glasses are developed by LG for its Cinema 3D TV’s. Being a passive glass it doesn’t require any power to operate. The glass is specially designed for viewing 3D games. Certain Sony TV’s are also compatible with the AG-F310.

AG-F310 was released back in 2012 along with LG Cinema 3D TV. Due to its durability and quality, it is still available in the market and cam act as a good replacement unit.

Buy from Here.

Panasonic TY-EW3D2ME 3D Eyewear Glasses

Panasonic TY series of 3D glasses are active-shutter glasses. A rechargeable battery fuels the glass. The TY-Series of glasses are known for their fast charging and good battery backup.

TY-EY3D2ME looks similar to an underwater goggles, but is solid and durable. They are compatible with Panasonic VIERA 3D TV and some other Active 3D TV’s. TY-EY32DME has got in-built battery saving option. A USB port is used for charging the glass.

Click here to purchase it from Amazon.

Universal 3D Glasses

The above three glasses provided are OEM specific and is optimized for any specific model or a series of selected TV’s by the manufacturer. Here, lies the significance of a Universal 3D Glasses. These  glasses work in all most all 3D TV’s available in the market. Providing flexibility or a sort of interoperability. The above list is incomplete without a Universal 3D Glass.

Related: Best Notepad Tricks and Tips you can Try

Xpand X105-IR-X1 Rechargeable 3D Infrared Glass

Price: 4,999

Xpand – the first brand to develop a Universal glass. Offers wide variety of universal 3D glasses all around the world. The X103, X105 series of glasses are most popular as well as costly.

The X105-IR is an Infrared active glasses. They are multi-brand compatible with SONY, TCL, Philips, Grundig, old Samsung, Panasonic, Epson Infrared TV/Projectors and many other displays.

Amazon

Conclusion

Due to less demand for 3D TV’s in the market. Major 3D TV manufacturers have decided to stop support for 3D TV’s from 2017 onwards. Currently, only LG and Sony are the two company still developing 3D TV’s, but they also will soon stop the development. As a result of it some of the 3D glasses stated above also may soon disappear from the market.

In addition, always refer the TV manual before purchasing any 3D glass, to avoid the problem of incompatibility.

Best Twitter GIF Downloaders

0

Twitter, as you may know, is one of the most popular social networking site.  People usually share their tweets with Photos, gifs, and Videos.  Twitter doesn’t allow users to download GIF and videos, there is a problem for users who want to save those videos and GIF for further use.  In this article, we will guide you on how to download GIF and Videos form Twitter.

Best twitterGIF Downloader

You can download GIF and Videos from Twitter through various methods. We will list all of them for you, that includes Online web Video Downloaders, Twitter GIF Downloader for Android and iOS, third-party tools.  All the methods are very easy, we will first start with Android and iOS  Apps to download GIF and Videos.

Method 1 – Twitter GIF Downloader Apps for Android and iOS

Tweet2gif – Android

It is a very popular app to download GIF and Video Files from Twitter. Tweet2gif has a very easy user interface, you just have to enter the url of that Video or GIF which you want. After entering the url you have to click or TAP on Download MP4 or Download GIF button. To use this app you should have Android 4.0.3 or up running on your phone.

[button-green url=”https://play.google.com/store/apps/details?id=org.trecet.nowhere.tweet2gif” target=” _blank” position=”center” rel=”nofollow”]Tweet2gif[/button-green]

Also Read:Best JioFi alternatives available to Buy

Gifitize Save Twitter Gifs –iOS

Gifitize is one of the best apps to download and save the GIF and videos from Twitter. Apart from Twitter, Gifitize for iOS can download GIF from Reddit and Imgur app. It also has the support to send the saved GIFS via Gifitize keyboard. It supports 9 languages so far including Chinese, Portuguese, Hindi, and Spanish. However, to use this app your phone should be running on iOS 9.3 or above version.

[button-green url=”https://itunes.apple.com/us/app/gifitize-save-twitter-gifs/id1124218879#?platform=ipad” target=” _blank” position=”center” rel=”nofollow”]Install Gifitize for iOS[/button-green]

Video Downloader for Twitter – Android

It is a very cool app to download Twitter GIFS and Videos. It has a very simple user interface. Videos Downloader for Twitter along with the download support, the app also gives the support to share it with your friends and family. It also gives you the Quick open Twitter button through which you can quickly go to your Twitter app. To run this app on your phone, your phone should be running on Android 2.3.3 or up.

[button-green url=”https://play.google.com/store/apps/details?id=com.billApps.TwitterVideoDownloader” target=”_blank” position=”Center” rel=”nofollow”]Download Video Downloader for Twitter[/button-green]

Video Downloader Tweet – Android

It is also a very popular app for downloading the GIF and Videos from Twitter and Vine app with over 500,000 installs. Video Downloader Tweet is a very simple app and easy app to download videos and GIFS. To download content you just have to share that tweet to Video Downloader Tweet app or you can copy the tweet url and paste in the input field above the download button in the app.

[button-green url=”https://play.google.com/store/apps/details?id=com.seedecor.videodownloadertw&hl=en” target=”_blank” position=”center”]Download Video downloader tweet[/button-green]

Instube – Android

It is also one of the very popular app for Twitter Video and GIF Download. It is having the support for almost all the major social network sites which include youTube, Facebook, Instagram, Twitter, Vimeo, Vine, Live Leak, Dailymotion, Metacafe and many more. Instube app can convert the video into Wav, FLV, MP3. Its important to tell you that Instube is the third party app. So you have to enable unknown sources in Settings to install it on your phone.

[button-blue url=”https://www.malavida.com/en/soft/instube/android/#gref” target=”_blank” position=”center”]Download Instube[/button-blue]

How to format Pendrive using CMD (Command Line Prompt)?

Personal Computer/Laptops and MACs are the devices being widely used to perform the majority of backend tasks. Typically HDDs and SSDs devices are in rapid use nowadays to store content on these machines. But concurrently, devices like USB flash drives aka pendrive, SDcards and others are also available carrying additional advantages of portability, ease-of-use and ease of access. Today we will discuss to successfully format Pendrive using CMD.

Why Format USB?

Though formatting a USB drive/Pendrive is not something different than formatting other devices. User can choose between different options to format a drive as according to the hardware type. There are many advantages:

  • Formatting a drive resets and cleans the internal file system.
  • It efficiently improves USB drive performance facilitating optimal use with a computer system.
  • By formatting, data gets organized on the storage system.
  • It allows fixing users permission for some files that are regularly customized.

During formatting, always keep one thing in mind – Do Not Format if there is no backup. The removal of data will be permanent after formatting.  The formatting process may take some time depending on the USB’s capacity.

Steps to successfully format Pendrive/ USB Drive using CMD

  1. Connect USB Drive / Pendrive with your computer.
  2. In the search box, type “cmd” and select the best match of Command Prompt. Choose Run as Administrator by right clicking on CMD.
    administrator cmd
  3. Enter after typing “diskpart” in the command prompt window.
    pendrive format tgs
  4. To check your USB flash drive, type “list disk” and execute it. For example, if it is disk 3.
  5. Enter “select disk 3″.
    select disk 1
  6. Now type “clean” and wait for disk erasing.
  7. Enter “create partition primary“.
  8. Enter “format fs=ntfs”.
    Note: For other file system formats change the command ntfs into fat32, exfat, etc as desired.
    diskpart
  9. At last, for creating a drive letter to the flash drive type “assign”.

Related: How to Install Windows OS on Android

Users can easily format pendrive using the above-mentioned steps. Using diskpart method the USB flash drive can be formatted in any windows operating system.

How to disable Google Assistant – Android and iOS

Google Assistant has become a vital part of the Android ecosystem. We could not imagine the world of Android without the Google Assistant now. However, there are some users who do not use it or like it at all. For such users, it is better to disable Google Assistant as they could accidentally call it up. Hence, here in this article, we will guide you on how to disable Google Assistant on both Android and iOS.

disable Google Assistant

Google Assistant makes our task to be completed easier and faster. However, there’s a caveat like with any other tech which is the internet speed especially in developing countries like India. The Google Assistant works flawlessly only if you have a good internet connection. Though it works under a slow internet connection, it takes more time. Thus, it is better to do those tasks manually. Other than that, the Assistant does the job which it is intended to do.

No matter what Android smartphone you are using, the method to disable Google Assistant is universal. We have also mentioned steps to disable Google Assistant on iOS devices below it.

How to disable Google Assistant on Android

To disable Google Assistant, first of all, you will have to open the Google Assistant Settings. It can be accessed by two methods which are mentioned below.

Method 1: Through Google Assistant

  • Open Google Assistant either by using the hot word (“Ok Google” / “Hey Google“), long pressing the home key or pressing the dedicated hardware key if available.

Google Assistant Settings

  • Now tap either on the bottom left icon or the bottom right icon.
  • In our case, we selected the left icon and hence the below screen is displayed.

Google Assistant Settings

  • Select the profile icon on the top right corner. The profile icon will appear in the same position even if you have selected the bottom right icon in the previous step.

Google Assistant Settings

  • From the pop-up menu, tap on Settings to open the Google Assistant Settings.

Google Assistant Settings

Also Read:How to Install Windows OS on Android

Method 2: Through Phone’s Settings

  • The Google Assistant Settings can be accessed from the phone’s Settings too.
  • To do so, open phone’s Settings, navigate to Google and open it.


  • Further, find Search, Assistant & Voice and open it.
  • Under this setting, select Google Assistant to open the Google Assistant Settings.

Google Assistant Settings

We hope now you have opened the Google Assistant Settings, now follow the below steps to successfully disable the Google Assistant on your Android smartphone.

  • In the Google Assistant Settings, tap on the Assistant tab and scroll down to Assistant devices section.

disable Google Assistant

  • Now, select the phone you are using and disable the Google Assistant option in the next screen by toggling off the Google Assistant option.

disable Google Assistant

  • If you want to re-enable Google Assistant, it can be done simply by long pressing the home key and selecting TURN ON when prompted.

disable Google Assistant

How to disable Google Assistant on iOS

Method 1: Uninstall Google Assistant

  • Uninstall the Google Assistant app by long pressing the app icon and tapping on the cross option.
  • Thus, you have successfully disabled Google Assistant on your iOS device.

Also read: How to change mouse DPI on Windows and MacOS

Method 2: Disable Microphone Access to Google Assistant

  • Go to Settings -> Google Assistant -> Microphone and toggle off that option.
  • By doing this, Google Assistant will be disabled on your iOS device as it could not pick up your voice.

If you still have any doubt or query on disabling the Google Assistant, then do drop them in the comment section below. We will get back to you as soon as possible.